T1
San Donato
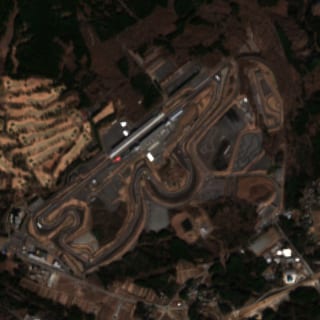
A fast right-hander at the end of the 1.141 km (0.709 mi) main straight, taken from speeds well above 300 km/h (186 mph) and reduced under heavy braking. The primary overtaking spot on the lap.
Braking referenceBrake on the 100 m board past the start-finish bridge. The corner crests slightly into the braking zone, hiding the apex until the car is settled.
TechniqueThreshold-brake in a straight line; the corner is long enough that an early apex compromises both mid-corner stability and the exit onto Luco. Aim for a late apex and roll a little entry speed off rather than trail-braking deep: the surface drops away on exit.
T2
Luco
An uphill left that opens the fast Luco–Poggio Secco esses; little braking is needed after San Donato.
T3
Poggio Secco
A fast right that completes the Luco–Poggio Secco sweep near the highest point of the circuit; usually taken with a late apex.
T4
Materassi
A fast, flowing left forming a left-right combination with Borgo San Lorenzo.
T5
Borgo San Lorenzo
A quick right exiting the Materassi combination onto the downhill run toward Casanova.
T6
Casanova
A sweeping downhill right that opens the very fast Casanova–Savelli S.
T7
Savelli
A faster downhill left completing the Casanova–Savelli sequence; a classic passing place.
T8
Arrabbiata 1
A wide, very fast uphill right, the first of the two Arrabbiata sweepers, taken with minimal braking.
T9
Arrabbiata 2
The second of two flat-in-top-gear right-handers that define Mugello's character, taken blind over a crest at well above 250 km/h (155 mph) with the apex climbing out of sight on entry.
Universally cited by drivers as the corner that earns Mugello its reputation as a "driver's circuit": a sustained, committed high-speed sweeper where the consequences of a mistake are very real but the time gained from a clean line is significant.
Braking referenceTurn in as the inside kerb of Arrabbiata 1 disappears under the front wheel. The apex of Arrabbiata 2 is hidden behind the rise until commitment is irreversible.
TechniqueTreat the Arrabbiata pair as one corner: get the car settled and pointed through Arrabbiata 1, then carry the load through the brief straight and commit fully to Arrabbiata 2 before the apex is visible. Lifting mid-corner unsettles the rear; the trust to stay flat is what the corner asks for.
T10
Scarperia
A tight downhill right that opens the Scarperia–Palagio combination after a hard downshift.
T11
Palagio
A left completing the Scarperia–Palagio combination, leading onto the closing section.
T12
Correntaio
A long downhill right-hand hairpin that doubles back on itself before the fast Biondetti flicks.
T13
Biondetti 1
The first, left-hand element of the fast Biondetti chicane, taken near full throttle.
T14
Biondetti 2
The second, right-hand element of the Biondetti flicks, leading onto the short straight before the final corner.
T15
Bucine
A long, downhill, increasing-radius left of roughly 180° onto the main straight, Mugello's defining final corner, where exit speed sets up the run to San Donato.