

Menu
← Circuits

Japan · Mobility Resort Motegi

Motegi

Honda's stop-and-go test in the Tochigi hills: 4.8 km of heavy braking zones, tight hairpins and a tunnel under the oval, where Victory Corner has the last word in MotoGP, Super GT and Super Formula.

Length
4.801 km
2.983 mi
Turns
14
Direction
Clockwise
Elevation change
30.4 m
100 ft
In use
1997-present

Mobility Resort Motegi

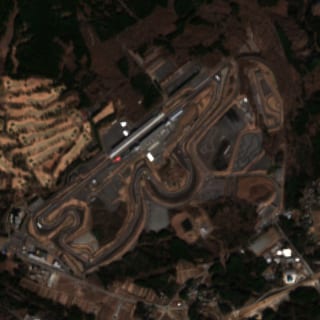
Mobility Resort Motegi opened in 1997 in the hills of Motegi, Tochigi Prefecture, built by Honda as a dual-circuit venue: a 1.5-mile oval Super Speedway and the ~4.8 km road course recorded here. Known until March 2022 as Twin Ring Motegi (the “twin ring” being the oval and the road course side by side), the facility was renamed Mobility Resort Motegi on its 25th anniversary. The road course runs clockwise over 14 turns (2.983 mi / 4.801 km) and is exceptionally flat by Japanese standards, with only about 30 m of elevation change across the lap.

A stop-and-go circuit

Motegi is the textbook “stop-and-go” track: short straights firing into heavy braking zones and a string of slow, near-hairpin corners, rewarding traction and braking stability over flowing momentum. The opening right-hand pair (Turns 1 and 2) is wide and fast, but the lap quickly settles into its rhythm of hard stops and tight exits. The fast 130R sweep (Turn 6) and the third-gear S-Curves (Turns 7-8) are the rare flowing relief before the slowest section of the circuit.

The Hairpin and Victory Corner

The first-gear Hairpin (Turn 10) is the heart of the lap: its exit feeds the signature stretch where the road course dips through a tunnel beneath the oval’s back straight before opening onto the long back straightaway and a hard-braking 90-degree right-hander (Turn 11). The lap closes through two left-handers into Victory Corner (Turn 14), a second-gear right-hander that is the last real passing chance before the line, and the corner that has decided countless Super Formula, Super GT and MotoGP finishes.

Corner-by-corner

  • T1

    Turn 1

    • Right

    A wide, fast right-hander at the end of the start/finish straight, reached under heavy braking; the first half of the quick opening right-hand sequence.

  • T2

    Turn 2

    • Right

    The wide, fast continuation of the opening right-hand sequence, carrying speed toward the first tight braking zone.

  • T3

    Turn 3

    • Left

    A tight left-hander taken after a downshift, tightening into the slow section that follows.

  • T4

    Turn 4

    • Left

    A second left-hander where the throttle goes down early for the run along the following straight.

  • T5

    Turn 5

    • Right

    A right-hander at the end of the straight reached under one of the heaviest braking zones on the lap; a key overtaking point.

  • T6

    130R

    • Right

    A fast, open right-hand sweep named for its radius, taken in a high gear at over 180 km/h; one of the few flowing corners on an otherwise stop-and-go layout.

  • T7

    S-Curves

    • Left

    The first half of the S-Curve esses, a quick left-hander taken around third gear that flows into the right-hand exit.

  • T8

    S-Curves

    • Right

    The right-hand exit of the S-Curve section, releasing the cars toward the slow V-Corner complex.

  • T9

    V-Corner

    • Left

    A very slow, tight first-gear left-hander, one of the slowest points on the circuit and an overtaking opportunity; overlooked by the V-Corner grandstand.

  • T10

    Hairpin

    • Right

    A tight, slow right-hand hairpin taken in first gear, its exit feeding the section that passes through the tunnel under the oval's back straight and onto the long back straightaway.

    The Hairpin captures Motegi's stop-and-go character: a near-standstill, first-gear right-hander whose exit decides the long run down the back straight and the heavy braking that follows. A mistake here gives a rival the whole straight to attack into the next braking zone, so the corner is a recurring decider in MotoGP and Super Formula racing. It also marks the circuit's signature stretch, where the road course dips through a tunnel beneath the oval Super Speedway before opening back out into the countryside.

  • T11

    90-degree corner

    • Right

    A hard-braking, roughly 90-degree right-hander reached at the end of the back straight; a second-gear corner and a prime late-braking passing spot.

  • T12

    Turn 12

    • Left

    The first of two left-handers that lead the cars toward the final corner.

  • T13

    Turn 13

    • Left

    The second of the two left-handers, setting up the entry into Victory Corner.

  • T14

    Victory Corner

    • Right

    The final corner before the start/finish line, a second-gear right-hander and the last real chance to make a pass before the line.

    Victory Corner earns its name as the last braking zone of the lap, the final opportunity to force a move before the start/finish line. A second-gear right-hander onto the main straight, it has settled countless Super Formula, Super GT and MotoGP finishes: get a run out of it and the sprint to the line is on, miss the exit and the door stays shut.